PROJECTION OF POINTS
Points: It is a dimensionless reference it has no size it gives only location and position. eg:centre of gravity of a plane or object ends of a line or pole etc,.And in projection of points the front view is represented by the respective small letter with dash and the top view is represented by small letter of the respective point,for example the projection of point A can be represented by a' in front view and a in top view.
The point can be represented by intersection of a cross or a dot in a circle and naming is done by capital letters. In order to obtain the projection of a point its location must have to be define in a perticular quadrant.
To define any object in space we have four reference quadrants namely 1st quadrant,2nd quadrant , 3rd quadrant and 4 th quadrant.
 |
| Fig-1 |
Now in the above figure the quadrant system is shown if we rotate the horizontal plane i.e, HP in such a way that the first and third quadrant always opens out, here XY line represents the reference line with respect to that line we have to draw the required drawings .Avobe XY line represents Vertical plane (VP) and below the XY line represents HP (horizontal planes) and the line XY represents the HP and VP .
Their are three possible'location of a point:
1) in anyone of the four quadrant:
>If the point is in first quandrant:
The point will be above HP and Infront of VP and in first quandrant the front view lies above XY line and top view lies below XY line. And the line joining the front view and top view is called the Projector.
>If the point is in second quandrant:
the point will be above HP and behind VP and In second quadrant the front view and the top view both lies above XY line.
>If the point is in third quandrant:
The point will be below HP and behind VP and In third quadrand the front view lies below XY line and the top view lies above XY line.
>If the point is in fourth quandrant:
The point will be below HP and infront of VP and In fourth quadrant the front view and the top view both lies below XY line.
2) in any one of the reference plane.
If the point is in anyone of the reference plane then the point will lie on the XY line
E.g- if the point is in HP then the point is in XY line and if the point is in VP then also take the point in XY line.
3)junction of reference plane.
To solve problems on drawing sheets:
1)Draw reference line XY. Mark HP and VP above and below XY line.
2) Mark the position of the points with respect to XY line.
3)draw X1Y1 line when required. Generally it is drawn to show the side view of the point.


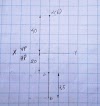
![Projection of points questions with answers | Projection Of Points [DOWNLOAD-PDF] VTU-notes](https://blogger.googleusercontent.com/img/b/R29vZ2xl/AVvXsEjf5v7wZkVWEqRwdONmQu10908wRF21NVlA0-wugx_zlQxplSJyWHEoS406XHkU_6YINeoatwARx6srB2knh1OenJOWT95yiFNVcMIopr2u9uf43iIm65JKzzwbdFv37qWPsgU8l_8EdUS8/w100/20210509_164139.jpg)


0 Comments
If u have any doubt let me know